
Tuesday, 19 January 2016
Animated face
This is used to show the emotion of the robot, this gif took a while to make and you can probably tell it's still a work in progress. It is also. Not that good at all.

3D artist research
MARK VAN HAITSMA
He is a very good 3d modler with my favourite of his works being on Metroid's Samus.
In 2002 he made these images.

On Artstation it says he works in these softwares.
Mark works as a Bungie senior artist and has made guns for Destiny as shown here.

I really like his Samus modelling from recently. As this is a Jaeger in the style of Samus. 
He also did this image and you can see how much he's developed since 2002. Which is the reason I like his 3d modeling, the development instead of staying at a certain point.

Wednesday, 13 January 2016
Artist interpretation and inspiration/2D Research
Because my Photoshop failed saving when I made a decent background before. I used my artist interpretation as it. By looking at these pins I have looked into the art of robots and pinned them on Pinterest as shown here: https://uk.pinterest.com/cgouldney/artist-interpretations-artist-research/
I used this image from Goro Fujita for my artist interpretation. If you can't tell already I used the background for my own art. His art is here posted by some Randall Sly http://goro-fujita-interview.blogspot.co.uk/2011/05/goro-fujita-gallery.html.
Goro Fujita made a lot of these arts from before 2006 to now.
As you can tell. My background is very similar to this art. As it was my own interpretation of it.

But as you can tell he's a better artist due to his experience and the amount of detail in his work.
Goro Fujita was born in Japan and moved to Germany at his early years, he founded a company with his friend called "Quaintix" for graphic design and programming work. As Goro got interested in 3D animation he would play around with cubes and spheres. has his work featured on Madagascar, Megamind and Niko, the new film that's coming soon according to the poster. He is working as a visual development artist at DreamWorks Animation.
Source: http://chapter-56.blogspot.co.uk/p/about-me.html
Monday, 11 January 2016
Test
 Specular map
Is the map that makes sure that certain part do and don't have shading.
The transparency map is one where you make something transparent, the darker it is the more transparent is is
 Normalmap
The normal map was used to create the bumps and can be used to make dents too.
 Colour/diffusemap
This is the basic design and colours what I wanted for this test.

Finished object
Wednesday, 6 January 2016
Model and colour map


This is my model and colour map, which I also used for the normal map with xNormal.
Texture mapping
 |
| Colour map in use |
Colour map:
A colour map is a function that transforms the colours from one image to a target image. This is adding the texture it'self to an image from a UV map so that you can get the shape correct.
Specular map:
 |
| Specular map in use |
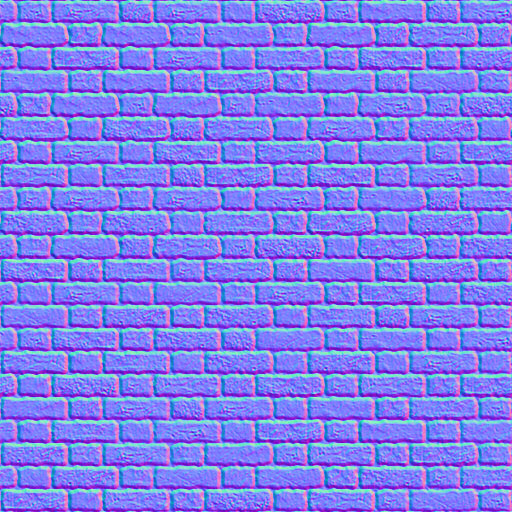 |
| Normal map |
A normal map is a technique used to fake lighting, bumping and dents. This is the most important technique and gives us the best outcome for our models.
Other mapping:
Opacity maps: Opacity maps are used to create parts of the model to be opaque, the us of this is to make an object partially transparent. Lighter areas of the render will be opaque.
 |
| Opacity map in use |
 |
| Self-Illumination map being used |
Self-Illumination map: They are used to create a glow on an object. This can be used to easily create a light for lamps and bulbs.
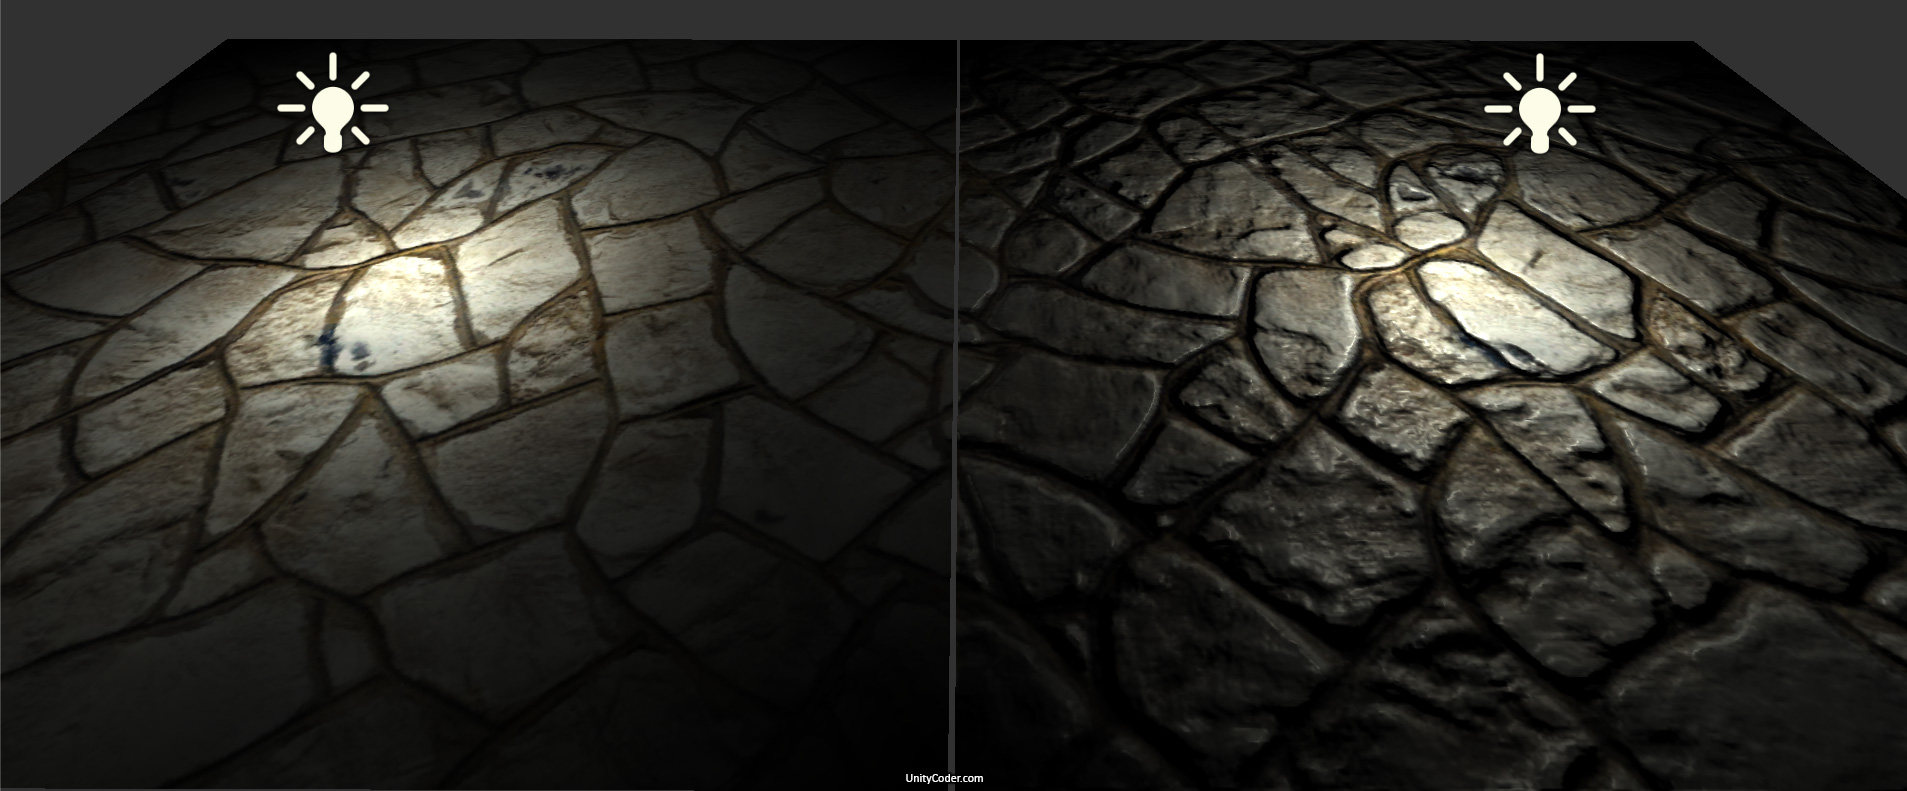
PBR rendering:
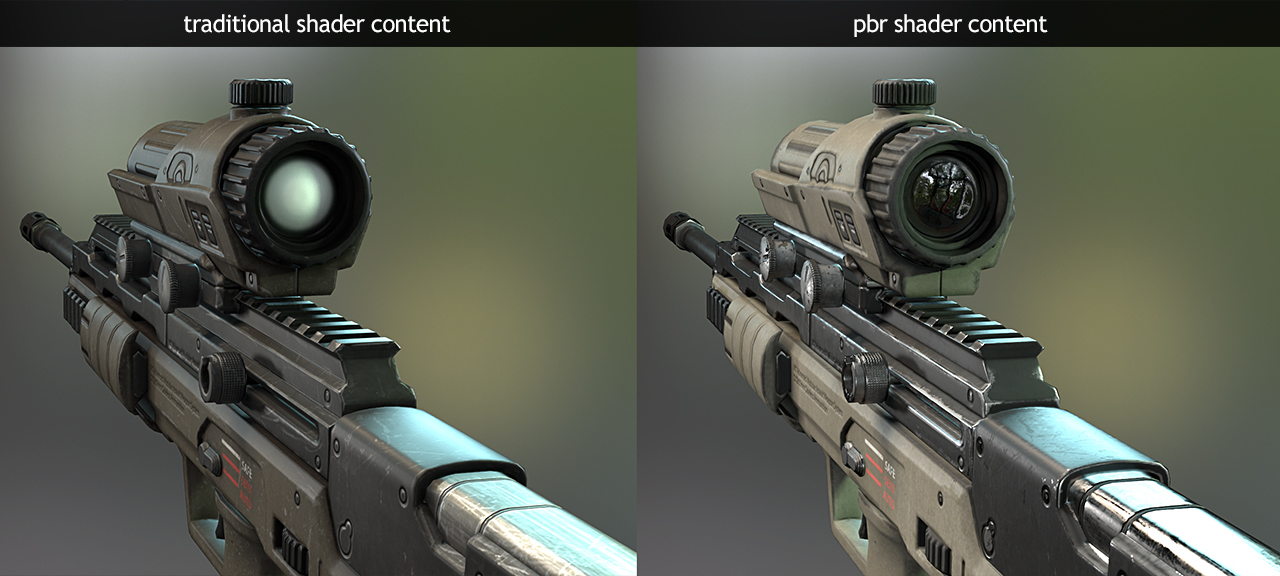 |
| PBR Rendering in action |
Monday, 4 January 2016
Maya
This is my work on Maya, using only 1 square I made a shield, but I did copy an image off of the internet because it's something that I like. I used extrude and moving only, I only ran across one problem which was solved by deleting and bridging it back together. I learnt how to bridge and extrude this lesson as well as model a little better than I usually do. As I wanted to finish it I did not do it at college, I will do it at home as I will need to use more than one object and this project was just with one. I spent a couple hours on this so far and I attempt to spend more, we also used the smooth tool which changed it from blocky to smooth.
Reference image:


Reference image:
What I have made(So far):


Subscribe to:
Posts (Atom)